Why I Abandoned Standard Web UIs
If you are still relying on traditional, simplified web UIs for Stable Diffusion and modern generative pipelines, you are essentially driving an automatic sedan when you could be piloting a high-performance fighter jet. Transitioning to ComfyUI was the single most liberating decision I made for my generative workflow.
Yes, the node-based interface looks intimidating at first glance—resembling a chaotic cross between an electrical circuit board and a developer’s debugging dashboard. But once you push past that initial learning curve, you unlock absolute, granular control over every single pixel, latent tensor, VAE decode step, and conditional weight in the generation graph.
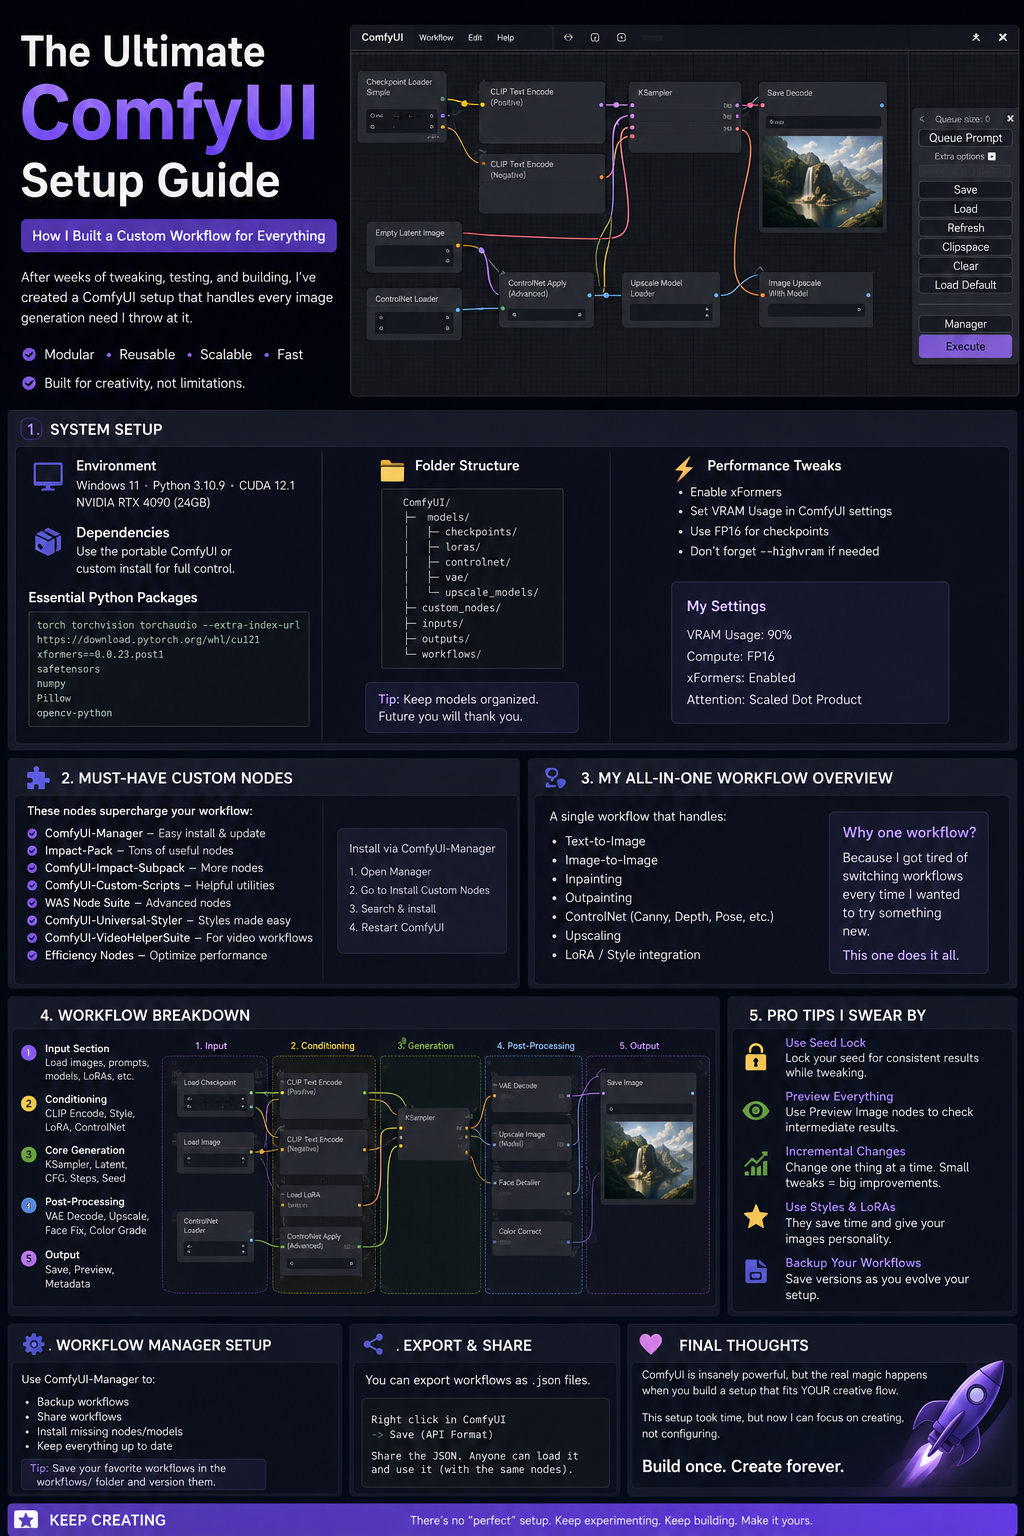
Instead of waiting for interface developers to push updates or add new feature blocks, I built a universal, modular ComfyUI workflow that handles text-to-image, high-resolution upscaling, advanced inpainting, face restoration, and video processing all within a single unified dashboard. Here is my exact blueprint for setting up the ultimate custom ComfyUI pipeline from scratch.

The Philosophy of Node-Based Generative Design
Web-based graphical interfaces hide the engine room behind clean dropdown menus and abstract buttons. While that design philosophy is great for absolute beginners, it completely breaks down when you need to troubleshoot generation bottlenecks, inject custom LoRAs mid-sampling, or combine multi-model pipelines.
ComfyUI exposes the underlying pipeline explicitly. If you want to intercept a latent tensor halfway through a sampling loop, pass custom conditioning values into specific UNet blocks, or split workflows into reusable subgraphs, you just drag a wire and make it happen.
Step 1: Setting Up the Core Infrastructure & Environment
Before assembling complex workflows, your foundational environment needs to be clean, updated, and optimized for performance.
-
Clean Installation: I recommend using either the official ComfyUI Desktop app or a manual installation managed via
comfy-clito ensure full compatibility with modern Python environments and PyTorch builds. -
Managing Custom Nodes with ComfyUI Manager: You cannot build a universal workflow without community extensions. Installing ComfyUI-Manager is non-negotiable. It acts as the package manager for your workspace, allowing you to search, install, update, and resolve missing custom nodes with a single click.
-
Optimizing VRAM and Memory Management: Modern generative models demand heavy GPU memory. Configuring ComfyUI’s memory flags (such as highvram or lowvram configurations depending on your graphics card) ensures you can load massive checkpoint files—like Flux or large video models—without crashing your system mid-generation.
Step 2: Building the Core Text-to-Image Backbone
Every good universal workflow starts with a clean, well-organized baseline pipeline that handles standard generation efficiently.
-
The Load Checkpoint Node: Links directly to your primary models directory. My base setup is configured to switch dynamically between Flux checkpoints, SDXL, and newer open-source architectures depending on the project.
-
CLIP Text Encoding: I separate my prompt inputs into distinct positive and negative prompt nodes. For advanced setups, I link multi-encoders to handle complex syntactic weight distributions.
-
The KSampler Node: This is the beating heart of the system. I configure mine with the
dpmpp_2msampler andkarrasscheduler for fast, clean convergence without requiring excessive step counts. -
VAE Decode & Save Image Nodes: Converts the finalized latent tensor back into viewable, high-resolution pixels and writes them directly to your output directory.
Step 3: Integrating Ultimate SD Upscale for Pristine Detail
Standard image resizing often introduces smoothing, plastic skin textures, or repetitive structural patterns. To achieve professional clarity, I integrated the Ultimate SD Upscale custom node pack into my master pipeline.
-
Connecting the Latent Chain: Instead of saving immediately after the initial KSampler, I pipe the latent output directly into the Ultimate SD Upscale node socket.
-
Tile Configuration: I configure the tile size to
512x512pixels with a64pixel padding overlap. This overlap is crucial; it prevents harsh visible seams from forming between processed tiles. -
The Refiner Pass: Each tile is passed through a secondary, low-denoise KSampler (setting the denoise parameter around
0.35) using a specialized refiner model. This injects micro-details—like realistic skin pores, brick textures, and sharp foliage—without altering the macro-composition of the original image.
Step 4: Automating Face Recovery and Detail Enhancement
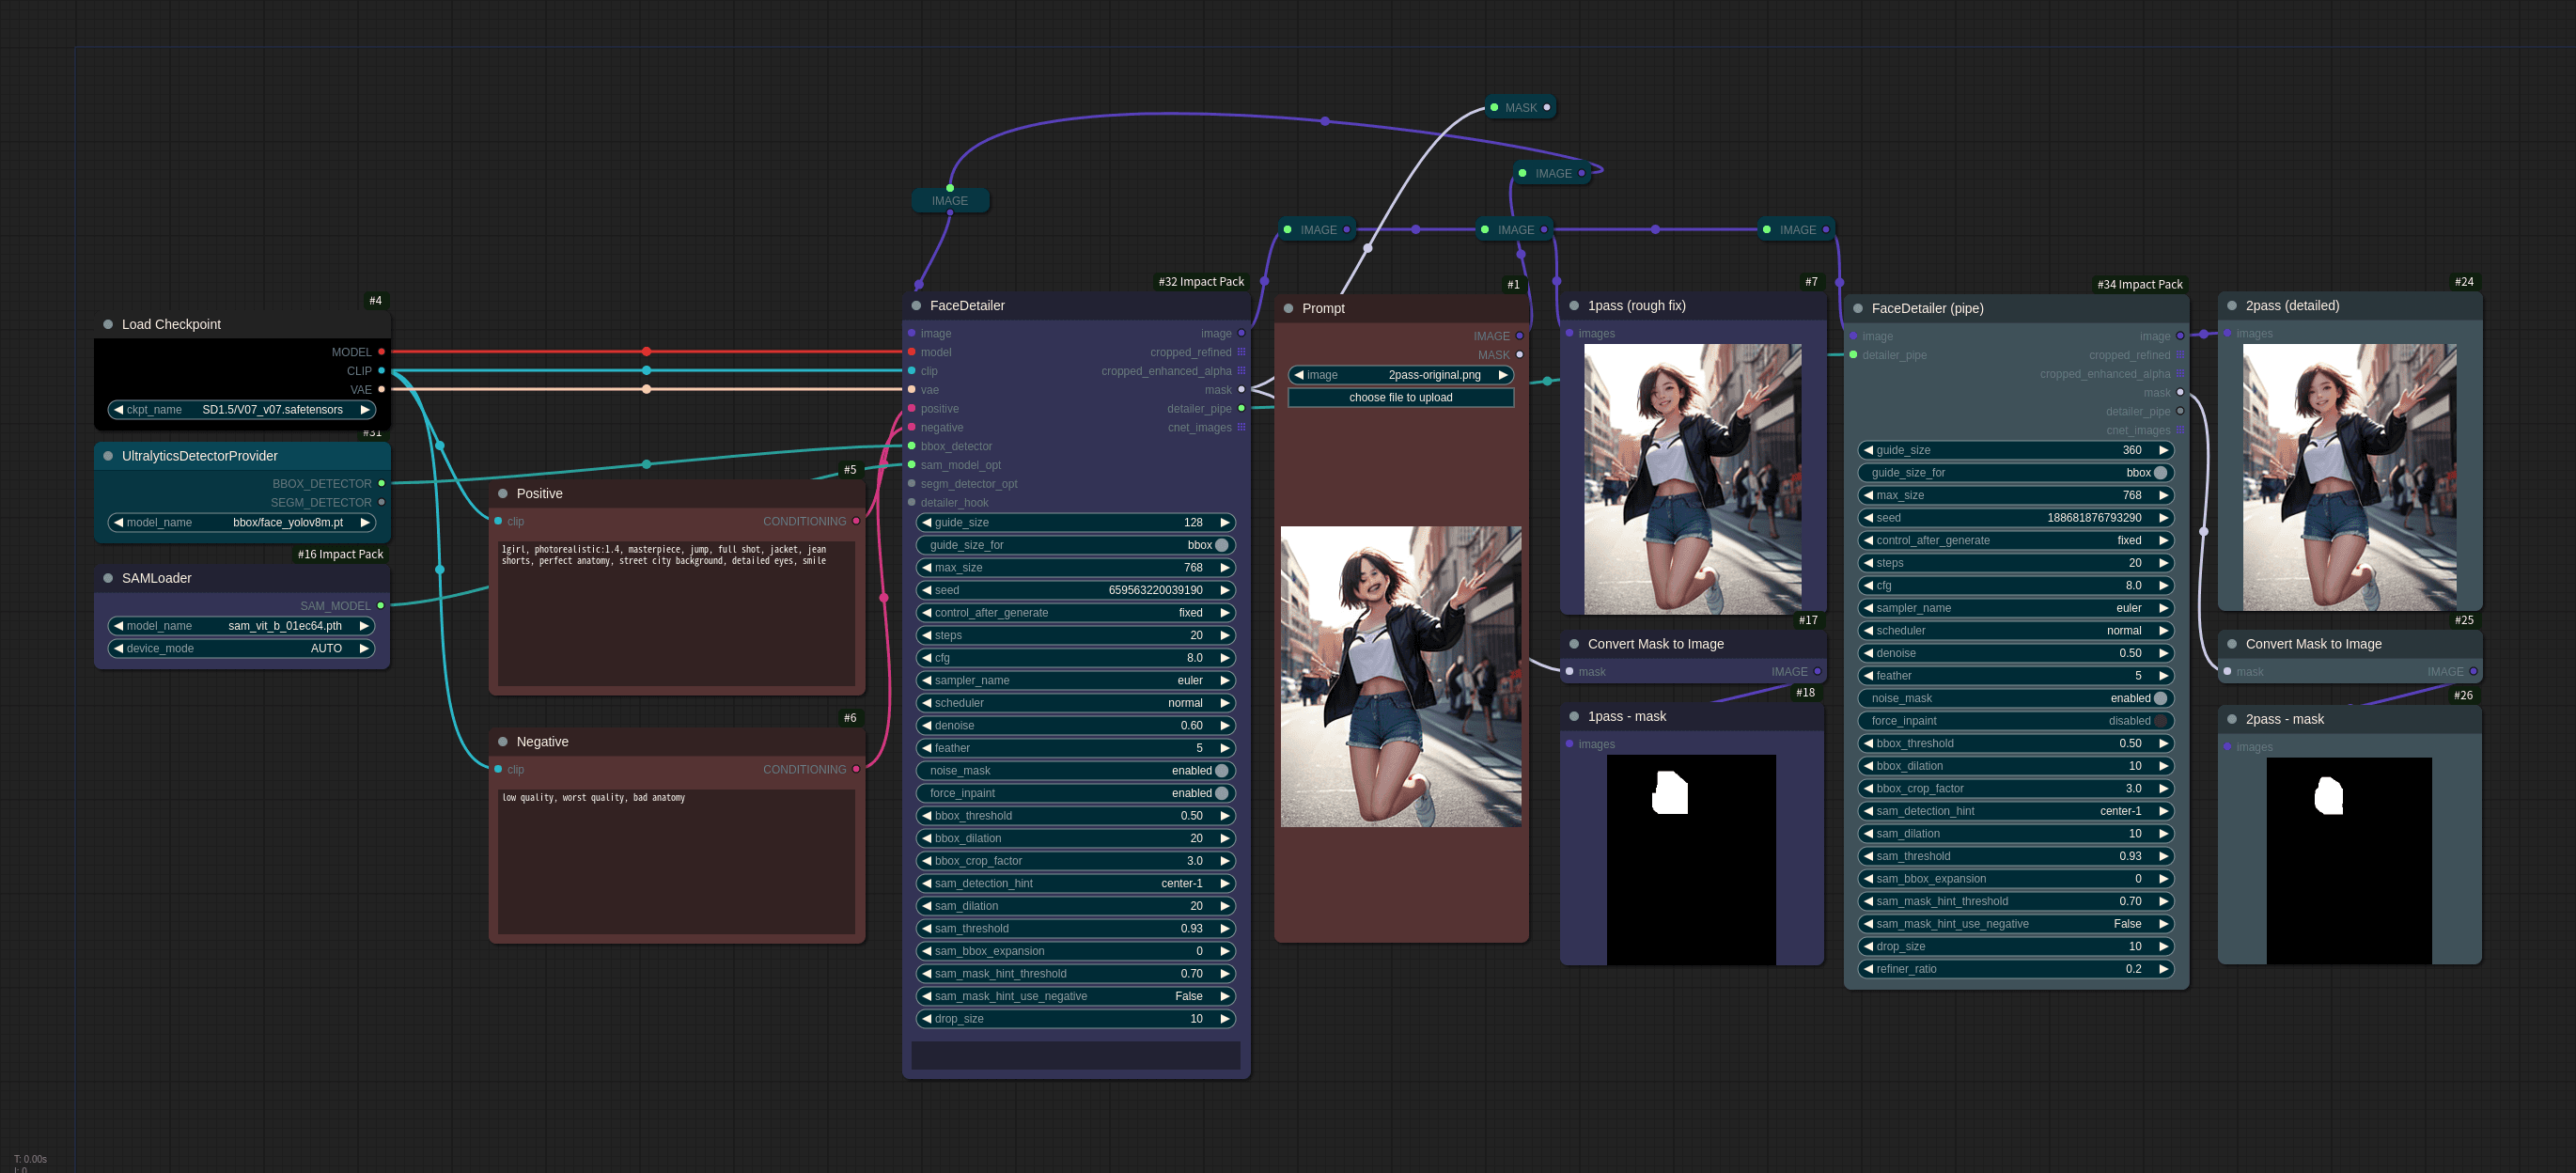
In the past, fixing distorted eyes, asymmetrical facial structures, or warped teeth meant exporting images into external editors or jumping between different software tabs. I eliminated that friction by building a dedicated post-processing block right into the graph using the ReActor Node.
-
Reference Portals: I hook a high-resolution reference portrait of the target character directly into the ReActor input socket.
-
Automated Blending: The node automatically scans the generated latent image, detects target faces, swaps them with the reference, and blends skin tones using CodeFormer restoration before the final save node executes.
Step 5: Modularizing with Subgraphs and JSON Portability
As your workflows grow to include dozens of nodes, the canvas can quickly turn into a spaghetti mess of crossed wires. To keep my master workspace clean and maintainable, I rely heavily on ComfyUI’s structural features:
-
Grouping and Color Coding: I organize distinct pipeline stages into color-coded bounding boxes (e.g., Blue for Generation, Green for Upscaling, Purple for Face Restoration).
-
Subgraphs: I group repetitive sub-tasks into encapsulated subgraphs, collapsing complex node chains into clean, single-node blocks with defined inputs and outputs.
-
JSON Portability: Every workflow you build in ComfyUI is saved as a clean, lightweight
.jsonfile. I maintain a directory of modular template files so I can swap entire processing blocks instantly depending on whether I am working on text-to-image art, architectural rendering, or video synthesis.
Conclusion
Building a universal ComfyUI workflow takes time, patience, and plenty of troubleshooting. However, the investment pays off exponentially. By moving away from rigid, pre-packaged software and designing an adaptive, modular pipeline tailored to your exact creative needs, you gain total command over your generative workflow. You no longer adapt your ideas to fit the software; the software adapts entirely to you.