The Quest for Absolute Character Consistency
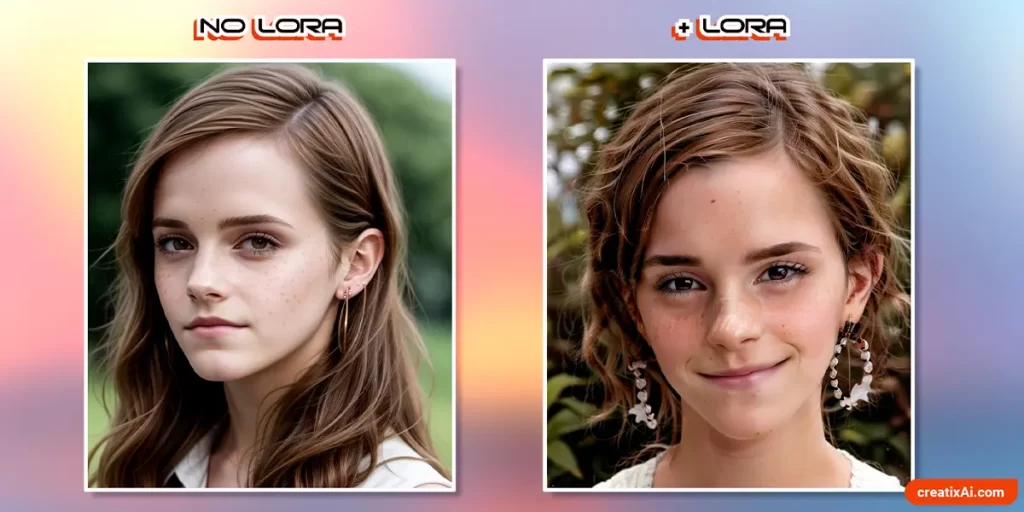
If you have spent any time generating AI images, you are already intimately familiar with the “character consistency nightmare.” You manage to prompt an incredible face, a striking aesthetic, or a unique protagonist into existence, but the moment you try to change their pose, change their clothing, or place them in a new environment, the AI completely forgets who they are. The eyes change, the facial structure warps, and your narrative continuity shatters.
For a long time, standard prompting was the only tool available. But true professional control requires moving beyond guessing games and building proprietary models. That changed permanently when I mastered training custom LoRAs (Low-Rank Adaptation) using the Kohya_ss GUI.
Whether you want to replicate your own face, bring an original character to life for a comic book, or capture a specific artistic aesthetic, here is the exact, battle-tested pipeline I use to train high-accuracy character LoRAs from scratch.
Step 1: Curating and Prepping the Dataset
The absolute golden rule of machine learning training is simple and unforgiving: garbage in, garbage out. If your source images are blurry, poorly lit, cluttered with background distractions, or inconsistent, your trained LoRA will output distorted, erratic garbage.
-
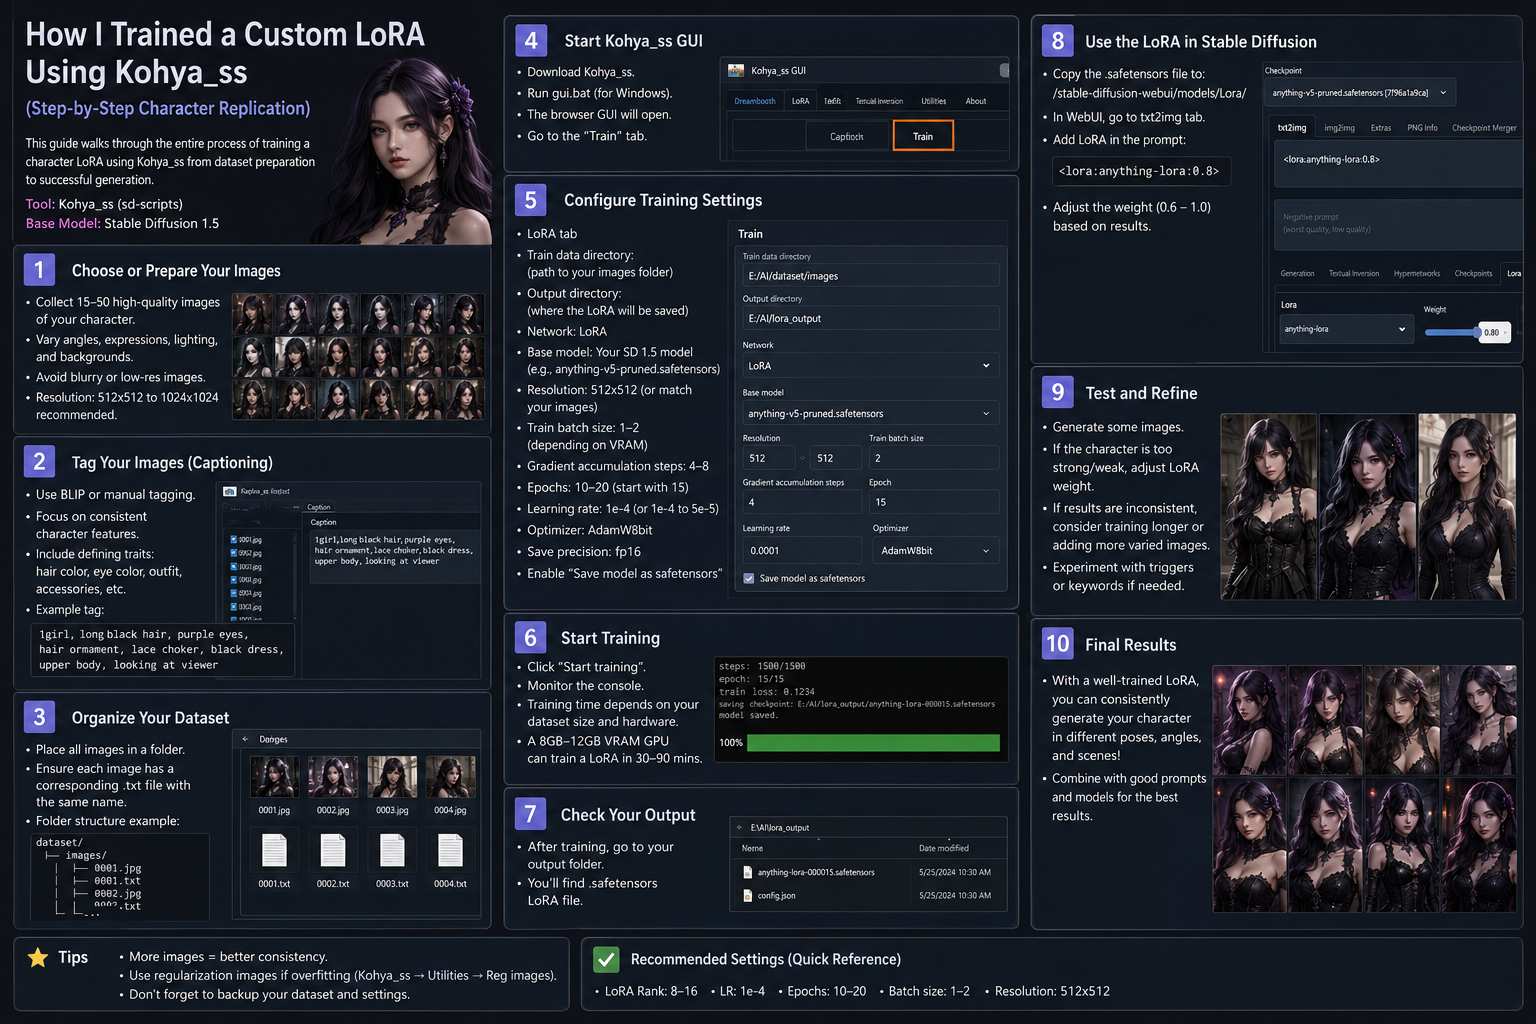
Image Count and Quality: I always aim for a sweet spot of 25 to 35 high-resolution images. Quality beats quantity every single time. Having 30 crisp, well-lit, professional-grade photos of a subject is vastly superior to feeding the model 150 blurry selfies taken under terrible indoor lighting.
-
Extreme Variety is Mandatory: If every photo in your dataset features the exact same facial expression, neutral background, and front-facing angle, your LoRA will become overfitted. It will refuse to render the character smiling, looking away, or interacting with objects. I ensure my dataset includes a mix of close-ups, medium shots, profile views, various lighting conditions (golden hour, studio light, dramatic shadows), and different outfits.
-
Avoiding Contaminants: Unless you want hats, heavy sunglasses, or specific branded t-shirts permanently burned into your character’s facial geometry, make sure your subject wears clean, simple clothing and bare-headed styles across the majority of the photos.
-
Resolution and Cropping: I crop all training images to uniform square aspect ratios—
512x512pixels if I am training an older SDXL pipeline, or1024x1024pixels if I am training modern architectures like Flux.
Step 2: Intelligent Captioning Strategies
Once your image folder is locked down, you need to tell the model what it is looking at. You have two choices: manual text files or automated tagging. For character replication, I prefer a hybrid approach that maximizes accuracy.
-
Automated Baseline Tagging: I run my image directory through the built-in WD14 Tagging utility inside the Kohya_ss GUI. This utility automatically generates a
.txtfile for every corresponding image, populated with comma-separated tags describing the contents (e.g.,1girl, solo, looking at viewer, dark hair, jacket). -
The Trigger Word Strategy: I prepend a unique, highly specific trigger word—such as
xyz_character—to the very beginning of every single text file in the dataset. This gives the neural network a distinct handle to pull when I want to invoke the character later in my prompt. -
Manual Cleanup: Automated taggers aren’t perfect. I open the text files and manually clean up background noise while ensuring defining structural traits (e.g.,
freckles,sharp jawline,short silver hair) are explicitly stated, while removing tags that conflict across images.

Step 3: Configuring Kohya_ss Training Parameters
Navigating the Kohya_ss interface can feel like staring at the cockpit of a commercial airliner. There are dozens of sliders, checkboxes, and numerical fields. Over the years, I have refined a stable, high-fidelity parameter profile that prevents common failure modes like “deep frying” or model collapse:
-
Base Model Selection: Select your target architecture (e.g., Flux.1 Dev or SDXL Base 1.0). Ensure your base model path points to a clean, uncorrupted
.safetensorsfile. -
Network Rank (DIM) and Alpha: I set my Network Rank to
32and my Network Alpha to16. This provides an optimal balance between the final.safetensorsfile size and the network’s capacity to learn complex structural features without bloating. -
Optimizer Selection: I always choose
AdamW8bitorProdigy. Prodigy is an absolute game-changer because it dynamically auto-adjusts the learning rate during training, removing a massive amount of trial-and-error guesswork. -
Learning Rate Configuration: For UNet and Text Encoder, I typically lock my learning rate at
1e-4when using AdamW8bit, or let Prodigy handle its default optimization curve. -
Epochs and Batch Size: I configure a batch size of
1or2(depending on my GPU VRAM limitations) and set my total epochs to15, ensuring the system saves a periodic checkpoint every 2 epochs so I can evaluate performance at different stages.
Step 4: Executing the Training Run & Monitoring Loss
With parameters locked in, I click Train Model and monitor the live output window.
-
Tracking the Loss Graph: Using TensorBoard linked to the Kohya_ss session, I watch the loss metric in real time. I look for a steady, gradual downward trend. If the loss curve flatlines too early, your learning rate is too low. If it crashes straight down to near-zero within the first few epochs, your model is overfitting, and your images will look stiff and rigid.
-
Checkpoint Evaluation: Because I configured periodic saves, I don’t just rely on the final output epoch. I often find that Epoch 10 or 12 yields a cleaner, more flexible likeness than Epoch 15.
Step 5: Testing and Refining Your New LoRA
Once training completes, I grab the generated .safetensors file from my output directory, drop it into my ComfyUI or AUTOMATIC1111 models folder, and fire up a test generation.
-
The Baseline Test: I write a clean prompt incorporating my trigger word:
A cinematic portrait of xyz_character wearing a leather jacket in a cyberpunk alleyway. -
Weight Tuning: If the face looks slightly distorted or overly rigid, I adjust the LoRA weight directly in the prompt syntax (e.g.,
<lora:xyz_character:0.8>). Lowering the weight from1.0to0.8often introduces natural flexibility, allowing the base model’s broader understanding of lighting and anatomy to blend seamlessly with your custom character likeness.
Conclusion
Mastering custom LoRA training with Kohya_ss transforms you from a consumer of AI imagery into a true creator. By exercising strict discipline during dataset curation, intelligent captioning, and careful parameter tuning, you can replicate any face, style, or asset with absolute precision—giving you total creative sovereignty over your generative pipelines.